Preparing for a New Growing Season in FarmQA
The snow has melted, the thermometer is all over the place, and it is starting to feel like spring! Here in North Dakota, we’re already seeing fertilizer trucks and implements hitting the field – gearing up for the new season.
That means it’s time to get your FarmQA application ready for the new growing season, too. Whether you’re a new customer or a seasoned one (see what I did there?), we want to ensure you get started right. A few of the steps you’ll need to take include:
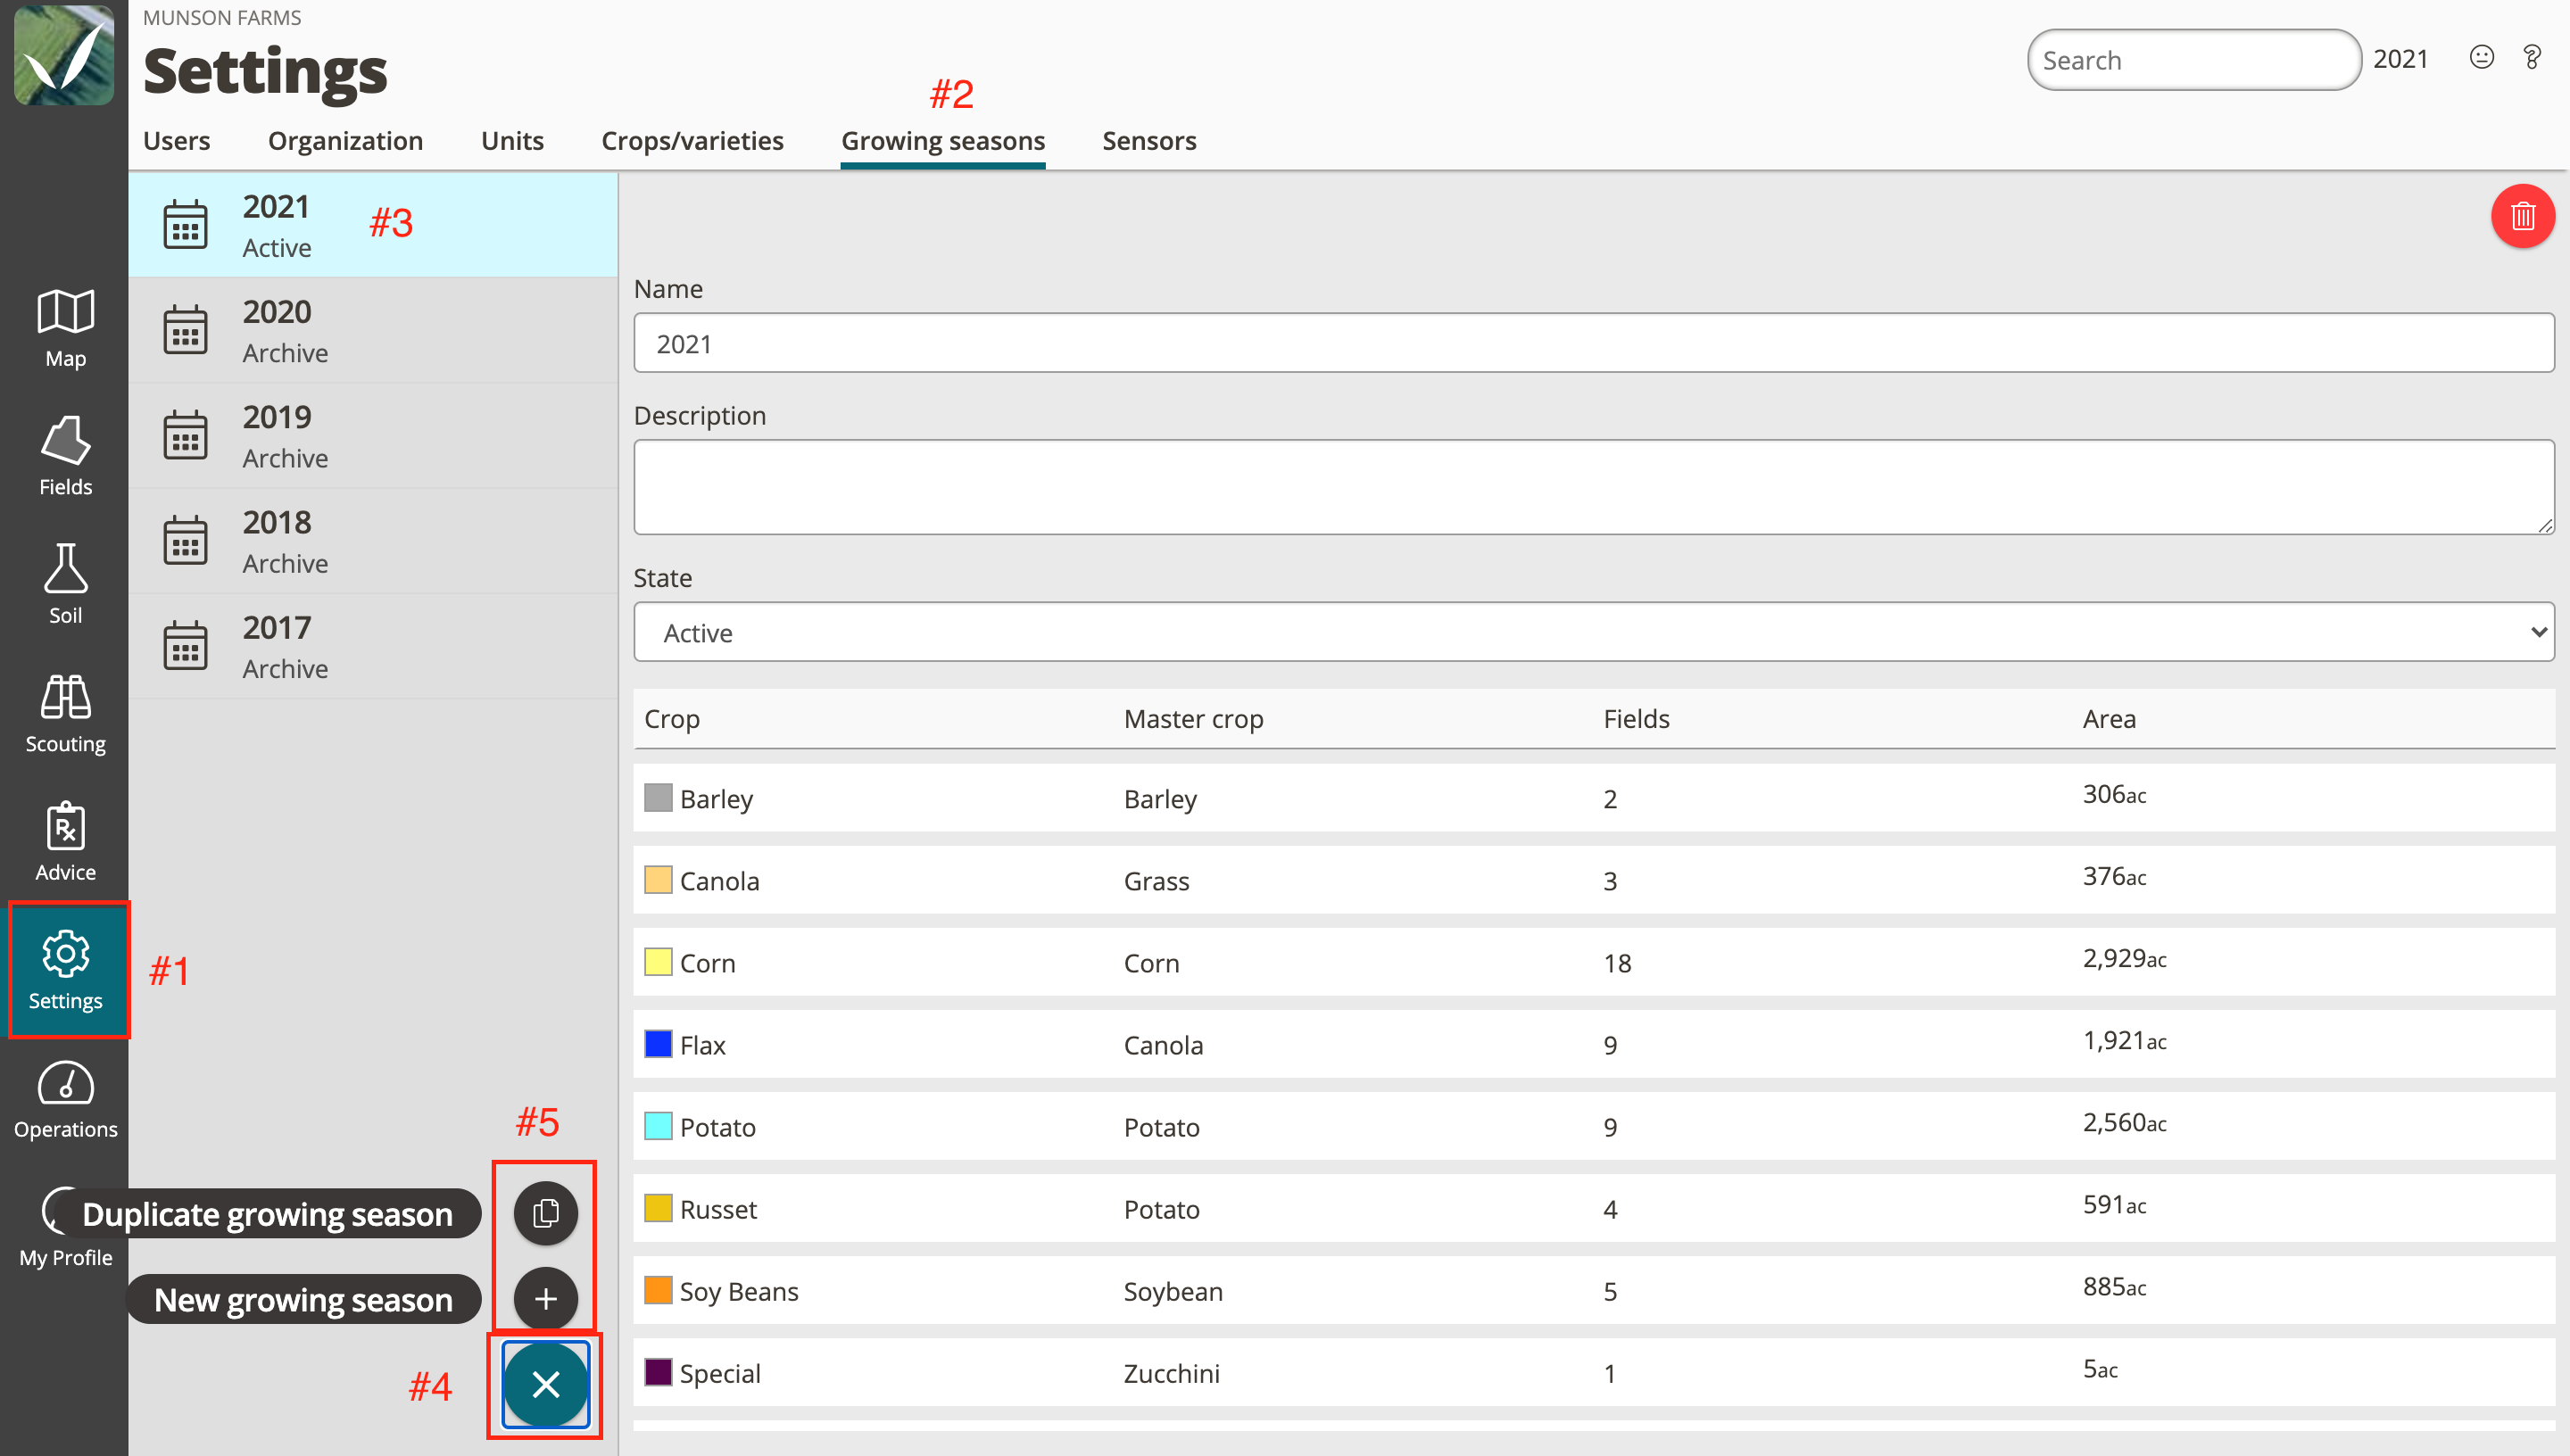
Adding a growing season
Setting up a growing season is important because it allows you to assign crops and fields to the season. You can then filter information by growing season elsewhere in FarmQA, allowing you to compare information year-to-year, for example.
Duplicating a growing season
No need to start from scratch. Duplicate a previous season and copy all crop to field associations into the new one.
Assigning a growing season “state”
In FarmQA, you can set a growing season state for all seasons within your account. The states are draft, active, and archived — each of which serves a purpose such as crop planning or cleaning up a list view.
For a detailed list of instructions to ensure you start the season off right, check out our new support article “Preparing for a new season in FarmQA.”